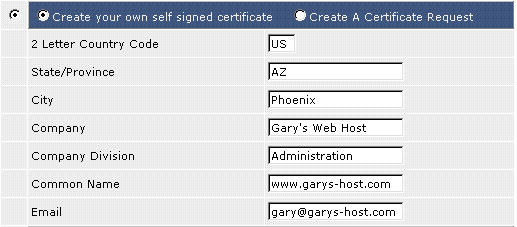
An alternative to the self-generated shared server certificate is a personalized self-signed certificate. First, access the SSL menu by clicking the "Advanced Tools" link from the main control panel menu, then click the "Install SSL Certificates" icon.

Step 1: Click the radio buttons to select "Create your own self signed certificate."
Step 2: Enter the information about yourself and your company.
A list of country codes is available at: http://www.site-helper.com/countrycodes.txt
The Common Name is the exact web address the certificate is associated with. In the above example, https://www.garys-host.com/anything would be valid, but not https://subdomain.garys-host.com.
Step 3: Click the "Save" button at the bottom of the screen. You will be taken back to the SSL menu.
Understanding non-Trusted Certificates
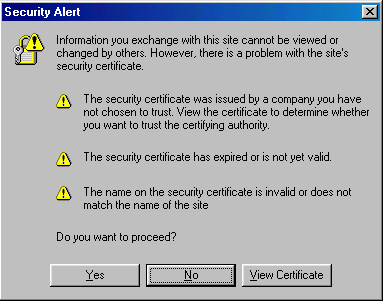
Although non-Trusted certificates provide a high level of encryption, they are not always the best choice because they are self-generated instead of purchased from a trusted authority. Because of this, visitors to your site may receive a warning popup window when they access a secure page:

If you can put up with this inconvenience, then a self-generated secure certificate is adequate for your site. If you are a company selling goods or services, we highly recommend that you purchase a trusted certificate. A non-trusted certificate may be harmful to a web site's reputation.
Uploading Files to your Secure Site
All secure files need to be uploaded to the /domains/domain.com/private_html directory. You may upload using the control panel's built-in file manager or FTP. For example,
/domains/domain.com/private_html/index.html ---> https://www.yourdomain.com/index.html
/domains/domain.com/private_html/secure/index.html ---> https://www.yourdomain.com/secure/index.html
The private_html directory operates the exact same way as the public_html directory.
Note: You will not see a private_html directory if the SSL feature isn't enabled on your account.

